Whether your garden is neat and tidy or a little on the wild side, weed trimmers can be very useful tools when vegetation becomes overgrown or appears where you don't want it. Most models will need the line replaced once in a while, so knowing how to restring your weed whacker correctly and efficiently is key. A new weed trimmer will probably come pre-strung with string and ready to go. If it comes without string, however, you can purchase pre-strung spools for it. (It's also a good idea to have an extra pre-strung spool ready for use in case you run out of string in the middle of a landscaping project.)
So what do you do if your weed trimmer comes without string or you've run out of string during a job? How exactly do you restring it? Just follow these simple steps to get back to whipping your yard into shape.
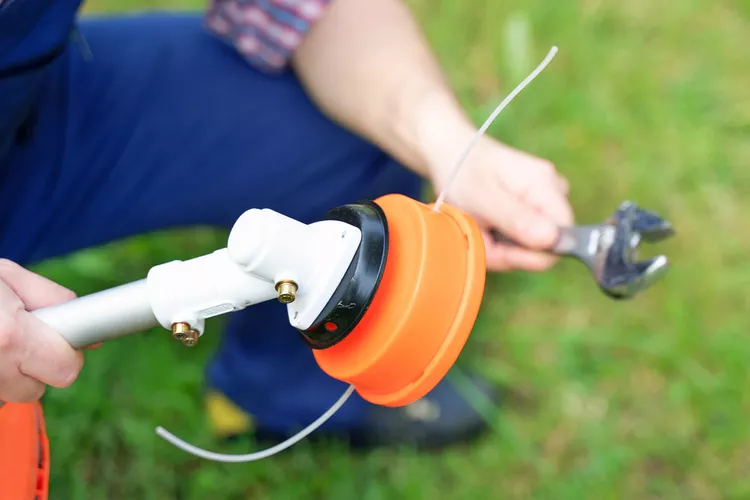
Step 1: Remove Existing Spool
Whether you're starting with a pre-strung spool or you're going to restring your existing spool, you will first need to remove it from the motor housing. There are multiple ways in which your model of trimmer might have the trimmer head or spool attached, but most will have two tabs that can be pushed simultaneously. Some commercial models, however, will have screws that need to be removed with a screwdriver.
Step 2: Cut String to Size
Before restringing a new line onto the spool, you will need to determine the proper length of string and how many pieces to cut. The amount needed will vary depending on the model of weed whacker you have. Smaller units will require less while larger units will more often require more. The amount of string can run anywhere from 8 feet to 25 feet, so it is best to know ahead of time how much line to pre-cut. Some weed trimmers will have one string while others will have two.
Step 3: Wrap the Line Around the Spool
With the spool removed and string cut to size, the next step is to begin wrapping the string onto the spool. The spool will have one or two holes in which to insert the end of the string or strings and hold it in place. The spool will indicate which way to begin wrapping the string–usually an arrow. In the direction indicated, begin tightly wrapping the string around the spool. If your trimmer has two strings, wrap both at the same time while being careful to keep each in its individual valley without crossing over. Wrapping the string neatly in the spool will ensure that it easily feeds through the proper mechanism. Some spools will have additional notches to hold the string in place until affixing to the weed trimmer.
Step 4: Attach Spool to Trimmer
Finally, secure the spool back onto the trimmer head and slip the string through the guide holes in the unit. You can allow for about 5 inches of string to pull through to begin, but initial length isn't especially important as it will adjust when the trimmer is turned on and tapped against the ground. Any excess line will be cut off.
Inevitably, there will be some variation between makes and models of weed trimmers. That's why it's very important to read the user's manual before operating a new piece of equipment. As there are many types of weed trimmers, there are also many types of string to choose from as well. Choosing the correct gauge will enable the trimmer to function properly and extend not only the life of the line, but the trimmer as well. As with any garden tool or machinery, always follow safety precautions and double-check your work.
New